How I built a live edge table
An excessively detailed description of my plans and failures taking on an ambitious woodworking project
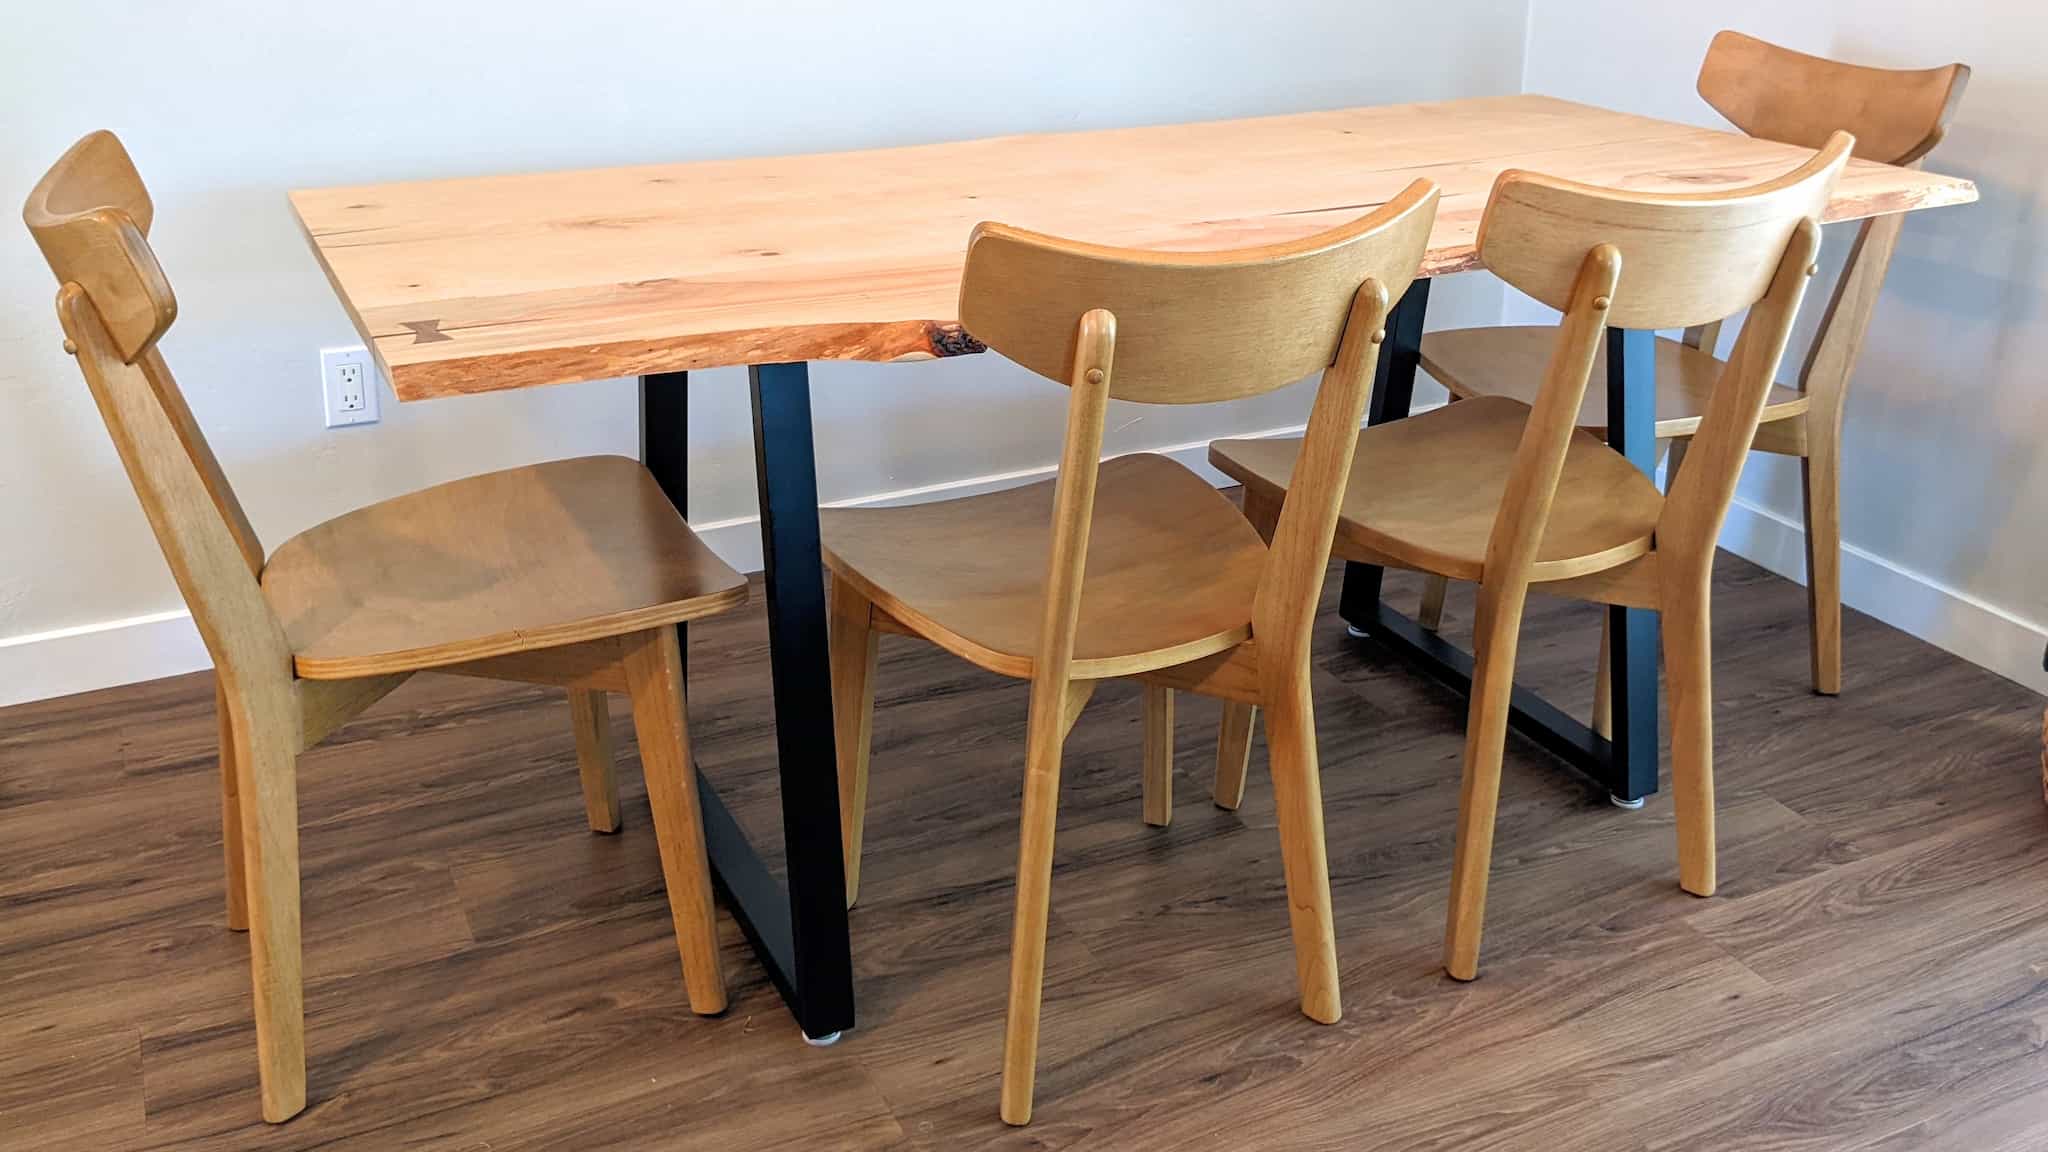
When we moved into our house we started talking about replacing our four person dining room table with something larger. That thought eventually led us to cooking up a plan to build one ourselves. I’ll admit I underestimated the time, thought, work, and money it would take. It consumed my mind and garage for about a year. Still, despite the cost and many errors along the way, I am proud of the end result.
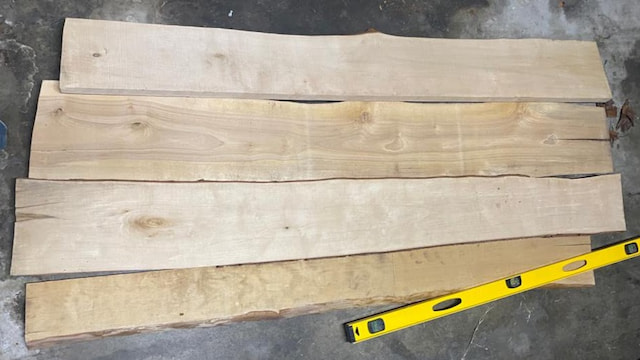
The project started with a flight to Washington state where Bekah’s uncle lives. He has experience in forest management and mills wood on a wooded property about an hour north of Seattle. We selected some pre-cut pieces of cherry and rough cut them to about the same size. Then we took a rented car with just enough trunk space to fit the boards and drove back down the west coast. It was a beautiful drive, a good excuse to visit family, and a great start to an ambitious project.
Unfortunately, we realized later that the table wouldn’t be wide enough. So when my in-laws made a similar trip, we asked them to grab another piece of cherry.
Milling
Before I could really get going, we needed to let the boards dry out so they wouldn’t warp after the table was completed. We kept them stacked up in the garage for months with spacers to allow air flow. When I was confident the boards had dried out enough, we took it to a local mill shop to be cut into straight boards with the same thickness. This was honestly much more expensive than we wanted, but I also wasn’t looking to buy a planer. By letting the shop do the work, I could take one critical piece of the project and one large piece of equipment out of my garage.
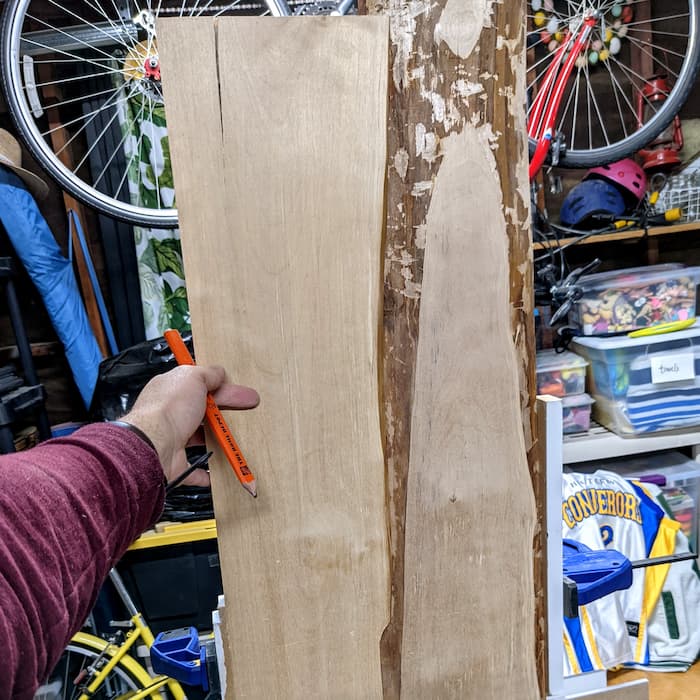
Due to way some of the wood warped while drying, the final boards were a bit thinner than I had anticipated after milling. A thicker table top would have been ideal but I was still left with more than 3/4 of an inch. The mill cut 3 sides of the 4 boards perfectly square, leaving one edge for me to cut as desired. When I lined up all the boards, we picked two of the boards to be the outside “live edge” with the natural shape exposed. The middle two boards would need the 4th edge cut. However, the boards were already a bit narrow at their smallest points, and the width of the table would end up smaller than I was hoping. To gain an extra inch an a half of width, I decided to try to splice together the thick side of one board with the thin part of the other.
I knew this approach would bring added complexity to the project, but I felt it was worthwhile since the table was already narrow. To splice to boards together, I started by running both boards through the table saw, but one of them I only cut part way. I then used a jigsaw to match up the rough edge of the narrower board. Unfortunately, I forgot to mirror my initial trace line and cut a 2 inch gash going the wrong direction. When I realized it was wrong I yelled so loud Bekah ran into the garage thinking I had cut myself. Thankfully I hadn’t gone too far and was able to recut.
With the rough jigsaw cut done, I then had to perfectly align the edges boards. This required clamping together the boards, identifying where the boards were tight, and shaving off the excess until the gaps disappeared. This was a time consuming process as it was difficult to determine where the boards didn’t match. It took up my free evenings for a couple months. The process wasn’t aided by the fact my used tablesaw wasn’t very good so my edge wasn’t square.
Joining
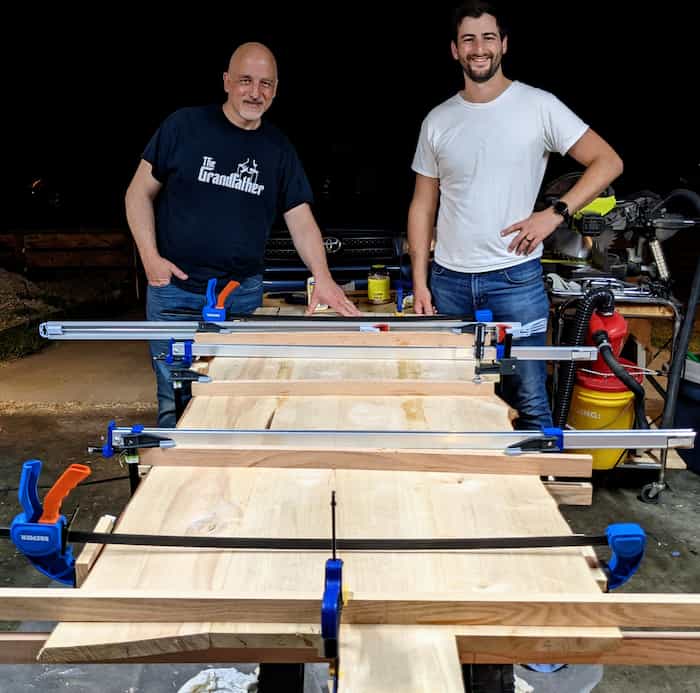
Around the time the boards were finally aligned, my dad had come to visit. We had a few days together so we planned to join all the boards together before he left. We started with the center two boards since they were the funkiest ones. I used a biscuit joiner to ensure the flat part of the board lined up straight and strong. But the rough angled end would only be held together by glue and clamps until we poured epoxy. The gluing process is incredibly messy. After applying glue on both sides and tightening the clamps, wood glue starts to spill out everywhere. While we checked to make sure the boards are aligned correctly and tight, we also tried to clean up all the drips of glue.
It took a while to figure out how were were going to clamp the last two boards together. We decided to glue both edges to the center at the same time. To protect the rounded, outside edge of the table we created L-shaped brackets and clamped/screwed those to the bottom of the boards. I had 4 wide clamps across to pull the boards tight together. Then we used oak call boards to keep the table flat. The side of these call boards that went against the table were tapered to apply pressure to the middle even as they bent.
We did a couple of dry runs thinking through where clamps would go before putting down glue. It was a mad dash to get glue on all 4 edges, insert the biscuits, line the boards up, clamp on the call board, clamp the top tight, and clean up dripping glue. In the moments after the initial clamping we had to make a few adjustments because the top was bowing slightly. After moving some clamps and adding some wood shims the top was looking better. Then we had to wait for it all to dry.
Epoxy
I was scared to take off the clamps but 24 hours later we unveiled the finished table top and it held together well. Still, since the middle of the table was barely held together I was eager to start pouring epoxy. This was my first time using epoxy and I had done a lot of research beforehand but I didn’t know how it would work on such a large, uneven surface.
I bought both thick and thin set epoxy since the chemical reaction created when mixing the two components of epoxy needs the right thickness/volume to create the temperature range needed to cure. Too thin and it will never fully harden, two thick and it could burn. My plan was to use the thin epoxy for an initial layer to get in all the cracks before using the thick pour. I needed the epoxy to seep through to the front of the table which would be a small crack.
One challenge with epoxy is that sometimes bubbles can get captured in the mixture. Ideally I’d have a vacuum chamber to remove the bubbles from the mix, but without one, I had to rely on careful stirring and hope that most of the bubbles rose to the surface. I considered using a dye in the mixture to make it not clear and hide bubbles but I was afraid I’d mix up the colors between pours and I liked the idea of a translucent fill.
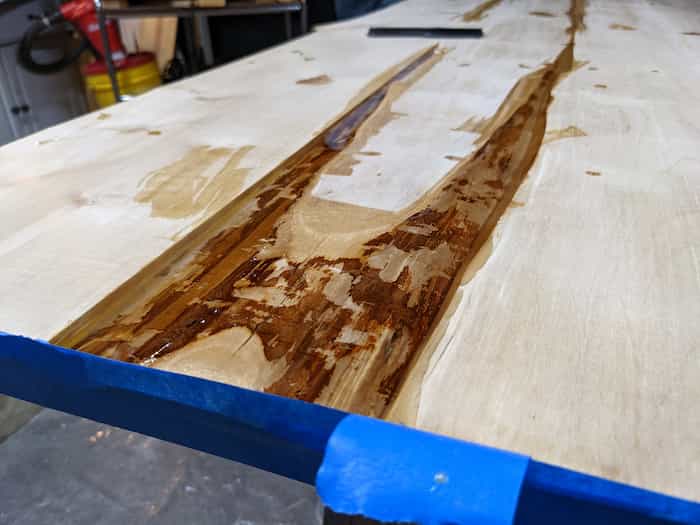
After taping off the edge and any possible places where epoxy could seep through the face, I mixed the first batch of epoxy. I made sure to mix slowly to avoid bubbles, but move fast enough to make sure the mixture was combined thoroughly before the chemical reaction got going and started to heat up. When the epoxy was mixed, I transferred it to another container and started pouring, using a popsicle stick to spread it along the edge. In addition to filling the center joint, I filled any knotty holes in the wood. It was challenging to pour it on small holes without making a mess. The epoxy would bubble down into the hole and then I would need to add more. I ended up with more than a few drips, but it was the underside of the table so it didn’t matter.
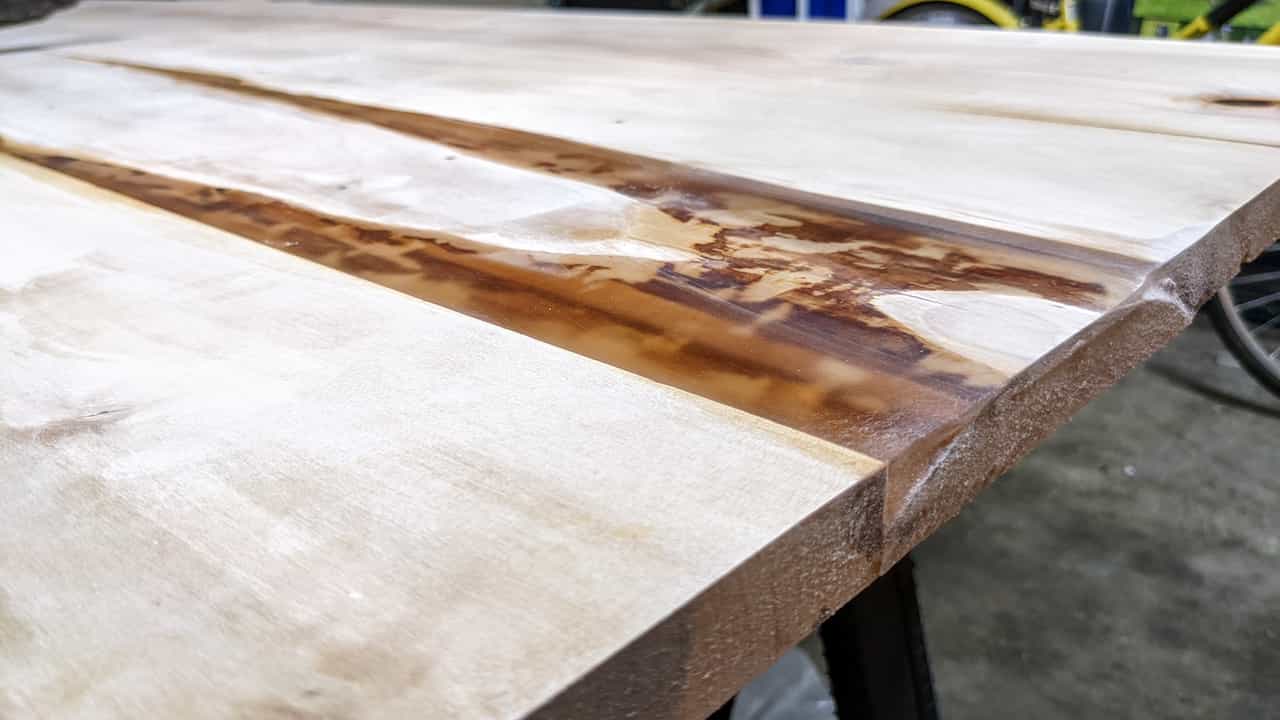
After the first pour, I realized that the area wasn’t deep enough to justify the thick-set epoxy, so instead I continued with more layers of the thin pour, roughing it up each time with sand paper for adhesion. After the last pour, the epoxy was even or above the rest of the wood so I took an orbital sander to sand it flat. Thankfully this wasn’t as time consuming as I expected. The epoxy shaved off fairly quickly and left behind a square edge. In the areas where I dripped on the wood surface, the epoxy made the wood look slightly darker, giving almost an oil-stained appearance but wasn’t too noticeable.
Bowtie
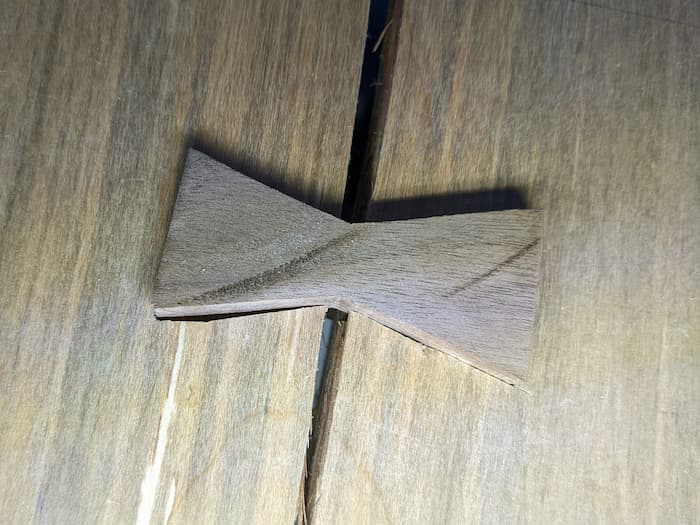
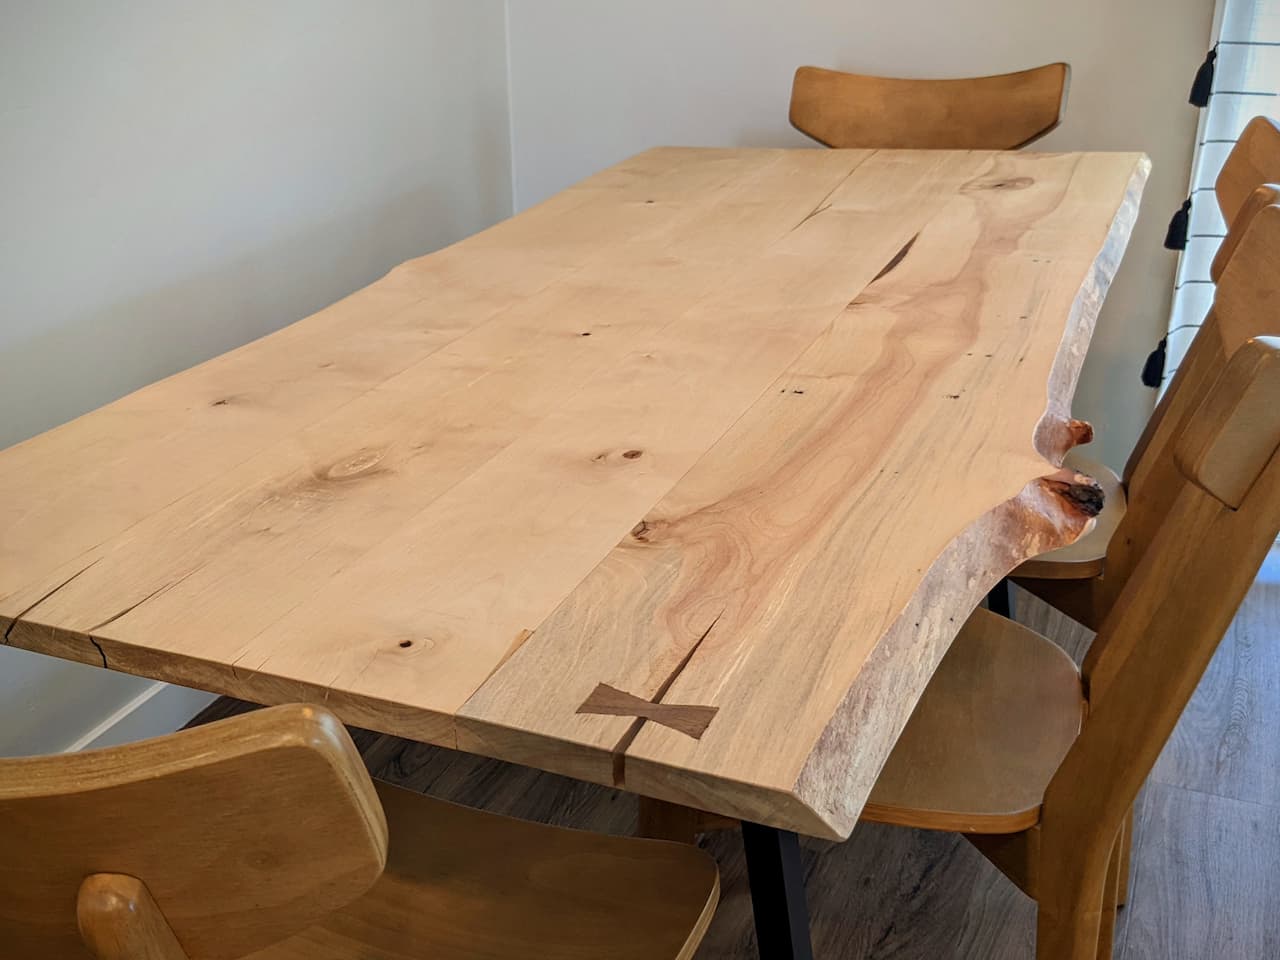
Once the back of the table was done, I moved onto the top. This was nerveracking because I knew any of these mistakes would be visible in the final product. The most notable piece of the top was the bowtie inlay. These inlays are often used across cracks in wood to prevent the wood from splitting more. Since I was also using epoxy, I mainly wanted an inlay for visual effect.
My father helped me pick out a small router to carve out the cavity for the inlay. I started by cutting a piece out of oak using a jigsaw so it would contrast the cherry top. I then made sure the sides of the inlay were straight and clean. After tracing the shape on the wood with a razor, I began to carve out the cavity. I practiced a few times on a piece of scrap, which was good because I discovered that the router wanted to jump around and could have left a gash. When I finally felt confident I started my final cut. It was going really well and I was cleaning up the edge with the chisel when the chisel shifted and made the hole too big. That was disappointing, but I had to wait to see how bad it would really look.
I moved forward with gluing in the piece. I had a moment of panic when I realized the piece was shorter than the cavity and it sunk below the table surface. However the glue was still wet and I was able to push it back into place from behind. To fill in any remaining gaps, I took whatever sawdust I could find from the cherry table top itself and wedged that into place. It wasn’t perfect but it was roughly the same color.
After the glue dried, it was time to fill the split with epoxy. I did the best I could sanding down the inside of the split in the wood and removing any wood fibers sticking out. This was harder than I expected because of the tight space. Once it was ready, I taped the bottom and side edge of the crack and poured several layers of epoxy. It was a little challenging getting the last pour level. At first the epoxy settled lower than the initial pour. But then during my final attempt some epoxy spilled over. This sanded down fine but left a slight discoloration. A cool feature of the crack is that you can shine a light through the bottom of the table. I would have preferred to avoid the unsightly bubbles, but the overall effect is still satisfactory.
Finish
Once all the epoxy filling was complete and the surface leveled with sanding, it was time to apply the final finish. We decided we wanted a matte finish with water based polyurethane. We didn’t want the amber color distortion of oil based poly on such a light piece or a high gloss finish that would highlight imperfections. The downside of water based polyurethane was that more coats would be needed. I applied the first coats with gloss polyurethane since matte finishes have additional compounds that some websites claimed could look cloudy with multiple coats.
Things seemed to be going well after the first few coats. Between coats I would wet sand to smooth out any raised wood fibers or marks with 800 grit sand paper. I knew I sanded through the first layer in some spots but that was fine. I was more careful not to sand through as I added more layers. As I was preparing for the final coat, I took a close look at one portion of the table and notice that the wood was reacting to the water and making a bumpy surface. This meant that I must have sanded off all 4 layers in that area. It was demoralizing when I felt so close.
The solution was simple, more rounds of polyurethane and less sanding. One benefit and challenge of the water based poly was that it dries faster than oil based. This allowed me to get through coats fast enough. Finally, I finished with two coats of matte polyurethane to give an even matt finish. It was really satisfying seeing the whole surface finished and seeing how the epoxy looked with a clear coat over it. It really tied the piece together.
Mount
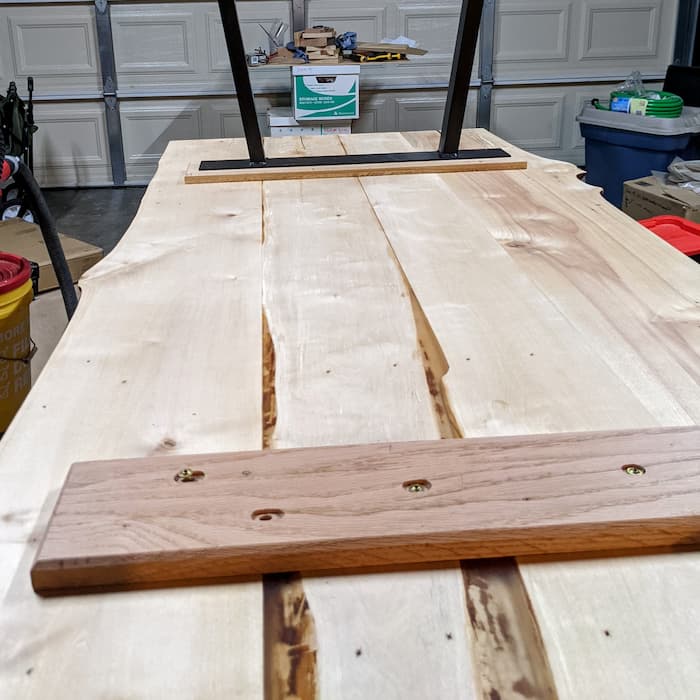
Once the table top was ready, we needed to mount it on some legs. We bought a pair of black table legs online. I could have mounted them directly to the table. However, because wood can expand and shrink across the grain with changes in humidity and moisture I wanted to leave room for this movement. The table’s mounting point only had small, circular screw holes. To allow for movement, you need slots where the screw can move while still providing downward force.
To mount the table legs, I decided to build wooden mounts with slotted screw holes that would attach to the bottom of the table. Then the legs would attach to the mounts whose size and orientation wouldn’t be susceptible to the same movement. I started by making boards wide enough to fit the mounts by glueing together smaller oak boards I had available. Since the legs would be flush against the surface of the mounting boards, I used my router to carve out a space for a screw head. In these spaces I drilled elongated holes by connecting two drill holes.
A surprise challenge was figuring out where to mount the legs. The chairs we bought have a fairly large seat. I wanted to be able to fit two chairs comfortably between the legs on the side. For visual and physical stability, having the legs closer to the ends was ideal. But we also didn’t want the chairs on the end to stick too far out either. To figure out where to put the legs, we ended up making a mock table top of the same length and clamping the legs in place in our dining area to try out different positions. This was incredibly helpful as it allowed us to actually sit in the chairs and experience how much room would be available.
I finished the mounts up with a nice beveled edge and layers of polyurethane. Once dry I was able to mount the boards to the table top, and the legs to the boards. Even though it is the bottom of the table I was really happy with how seamless it came out. I was concerned that the lack of reinforcement along the length of the table would make it feel unstable. There is a little movement but really not that much considering how it’s all mounted together.
Conclusion
After completing the project I have a new appreciation for this kind of fine woodworking. In some ways it was both easier and harder than I anticipated. The tasks themselves mostly felt within my reach. The main challenge is the level of detail and accuracy needed to produce high quality results.
Here are some of the defects I wish I could have avoided:
- Thinner wood thickness
- Narrow width of the table
- Miscut in center board
- Gaps in bowtie inlay
- Bubbles in epoxy
- Epoxy spills visible in surface
- Slight wobble along length of table
I’ve somewhat intentionally avoided calculating the full cost of this project. Not counting the round trip to Washington, the mill work was certainly the most expensive part. Though probably not recommended I skimped on the tools. Thankfully, I had been given quite a few tools already. The most expensive tool I bought during the project was a cheap $50 used table saw for this project. I also got a used biscuit joiner, a hand planer, chisels, and clamps. It’s worth noting that epoxy isn’t cheap either, costing somewhere between $50 and $100 for this project plus the polyurethane products and application products like brushes.
Ultimately, I would suggest you only attempt a project like this if you are interested in learning the process. This is not a project to save money. The time and materials are all fairly expensive. I think this project only was worthwhile because of how we sourced the wood and because I enjoyed learning each process. Ultimately what we got was a very personal and unique piece inlaid with lots of memories.
Special thanks to my dad, uncle, and cousin for their advice as I worked on this project. And thanks to Bekah’s uncle for the lumber. I look forward to seeing his own wood projects with Osprey Natural Woods in Washington.
Responses
See how to respond...
Respond via email
If you'd prefer to message me directly, send an email. If you'd also like your message to be visible on the site I can add it as a comment.
Reply via Email
Respond from another site
Responses are collected from posts on other sites. Have you posted somewhere that links to this page? If so, share the link!